What is Rookie drive?
Rookie drive is a personal project, which consists of creating a USB virtual disk drive for MSX computers. The goal of the project is to learn the MSX standard architecture, Z80 assembler programming, PCB design tools, etc.
Currently Rookie drive includes these features:
- Floppy Emulator
- Mass storage (requires 128K or higher)
- USB floppy disk controller (UFI)
This is an exciting hobby, because of an MSX was my first computer, I really want to go deeper into my first computer system.
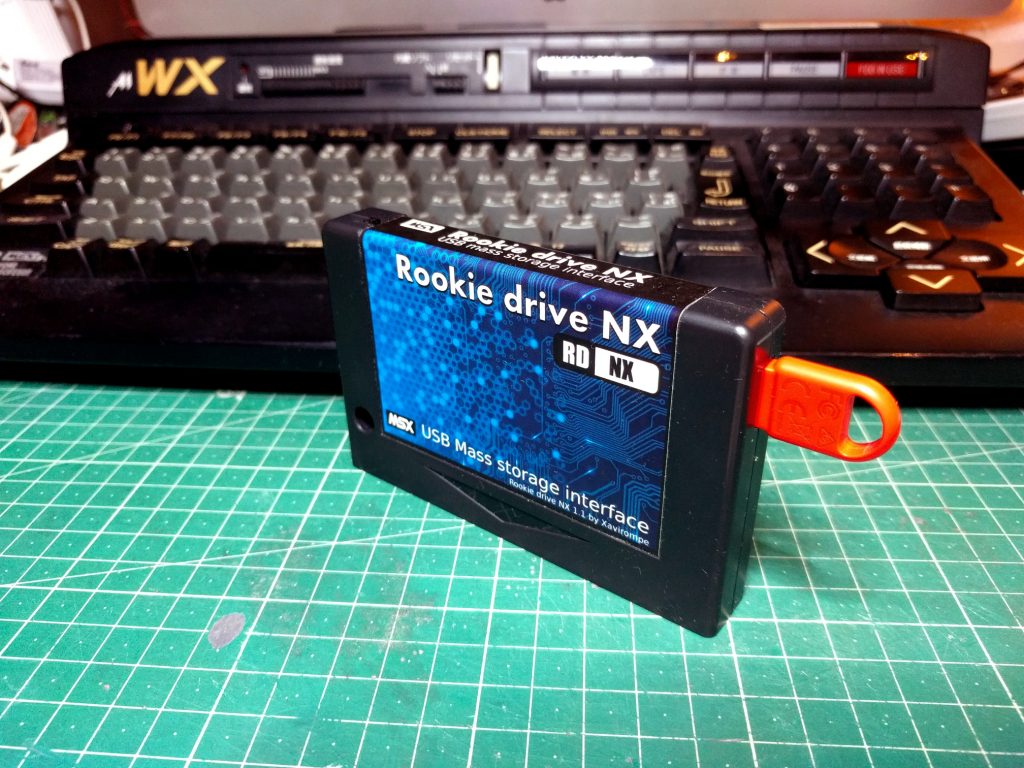
The resulting hardware, which I call the Rookie drive, consists of an MSX “cartridge” with a USB slot that can be connected to storage devices, such as a USB stick or a hard drive (most require external power). Rookie drive has the necessary driver to load a diskette image file (currently 720k) and be able to operate with it as if it were a conventional diskette. The system also allows you to swap the diskette image, list the files in the root directory, create new images, format current image (currently experimental), and keep the “disk” inserted between computer restarts.
It should be noted that in the current version only one disk image can be used at a time, and that the system only works with diskette images (currently 720kb), so it does not include direct access to the USB disk, but to the image files contained therein.
Why is it called Rookie drive?
Since I am a “rookie”, in this world of assembler programming and hardware development for MSX, I thought it appropriate to reflect it in the name of the project … simply.
The motivation
I recently I don’t know why, but I felt the call of the MSX, it is something curious, the illusion that can get to turn on an MSX so many years later (30 or more). I wanted to learn about the MSX, so I bought a Tohsiba hx-10, to repair it, I finally restored it and again I encountered the same problem of yesteryear, how to load games and be able to enjoy enjoy instantaneously? ….
So I started my search … along the way I decided to experiment with the fast cassette loads, since 30 years ago the hitbit manual (if I remember correctly) already indicated that the loading speed could be specified at 2400 baud instead of 1200.
So I picked up an MP3 player, and tried it, and it actually worked very well… with this method on the HX-10 I got speeds up to x3 (using audacity). Then I discovered the OTLA project, which turned out to be awesome, loading games in 25 seconds … !!! Oh my God!!! Where were you 30 years ago !!!
The puzzle
I went ahead and I started to clone “cartridges” … believing it would be very easy, it worked halfway … 16k, 32k and nothing else. Then looking around I found the project “Coding laboratory” Raul’s virtual disk for MSX
This project uses an arduino, with some extra electronics, to simulate an MSX-DOS 1 disk drive, with the particularity that is supported by a PC as a “medium” of storage, communicating by serial port. I tried to copy and improve the invention, but failed, it worked me partially.
Again, searching the internet I found an IC to use usb storage units with arduino, and thanks to that I present today this project. The CH376s, is all I needed, well with the source code of Raul and Arjen Zeilemaker (in source forge), and also Pasmo, by Julian Albo (z80 cross assembler).
Returning to the CH376s, an IC designed to interact with microcontrollers and 8-bit processors, it can manage FAT partitions with high level commands, connect disk, mount partition, open file …. YES! open a file!. So I had the idea, I could develop a MSX drive for USB based image files .DSK ??? !!!!!! Yes! I thought it was a pretty good idea, so I bought several units of the IC, and I started testing with Arduino !! ???? Yes, because the documentation of the CH376S did not give much information on how to use it on a parallel 8-bit bus … I thought the best thing was to simulate the bus from arduino, and so I did, it was a bit hard, but at last i done it. One of the very interesting advantages of this chip is that it is connected to the data bus directly, the only additional circuitry that is needed is an address comparator to activate the device, so for the initial assembly it suffices with an eprom, a ch376s and An address comparator …. Great!!!!
Look at the Prototypes … they ara very curious…